
Mod 設定ページ
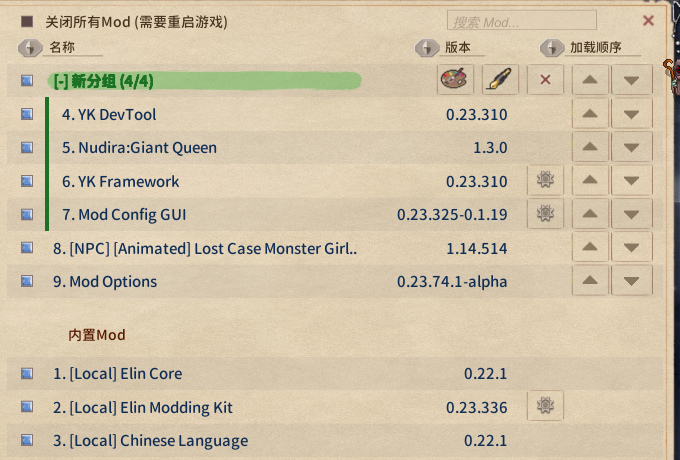
どの mod も自分の設定ページを持てます。Mod ビューアのその mod の行から開きます。BepInEx プラグインには Config.Bind した項目からページが自動生成されます。自分でレイアウトするなら IModConfig を実装します。
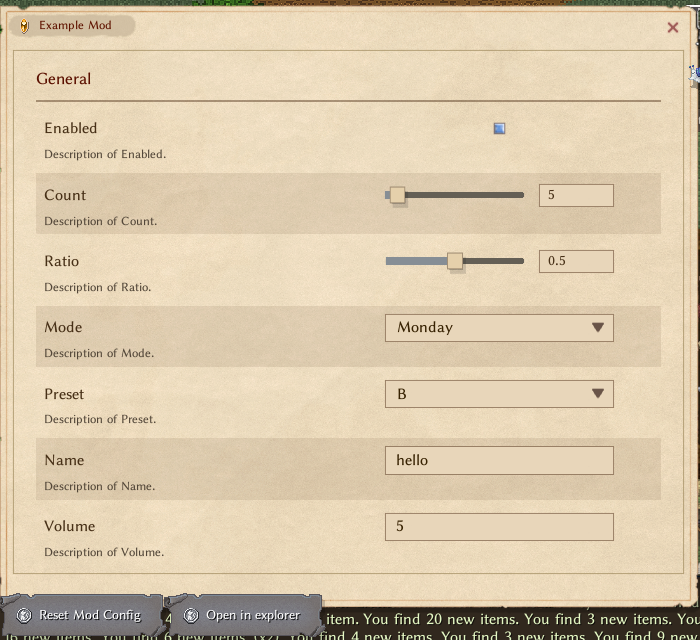
生成されたページ:
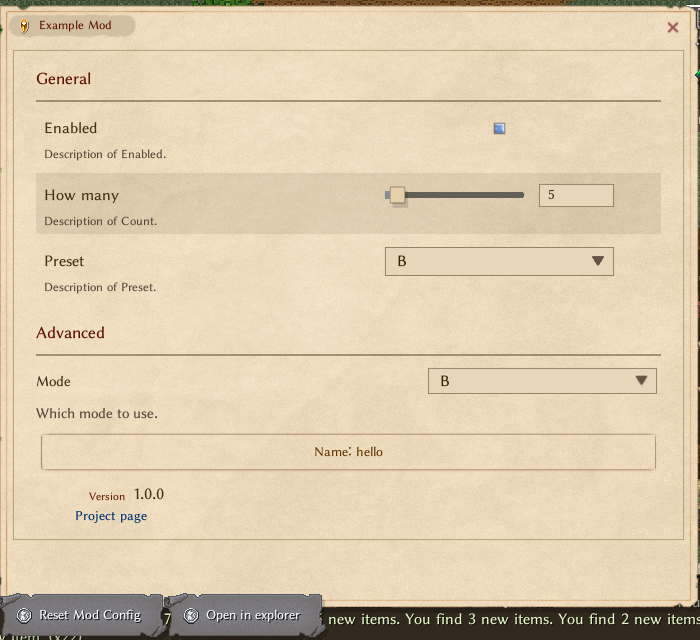
自分でレイアウト:IModConfig
IModConfig を実装したプラグインにはページが自動生成されず、OnBuildConfig でページ全体を組み立てます:
拡張メソッド(using EModding;) | 得られるもの |
|---|---|
note.AddAll(Config) | 自動生成ページ全体(セクション込み) |
note.Add(entry) | 1 行:ラベル、項目の型で決まるウィジェット、説明文、リセットボタン |
note.AddSlider(entry, min, max, label = null) | min〜max のスライダーの行。項目側で宣言した範囲は使わない。行の Slider を返す |
note.AddDropdown(entry, values, label = null) | values を選択肢にしたドロップダウンの行。項目の型は問わない。返る UIDropdown は項目に結び付いているので SetList し直さないこと(自前のリストには note.AddDropdown(label)) |
どれも項目を直接読み書きします。セクション名・ラベル(項目の Key)・説明文・ドロップダウンの選択肢は、その文字列自体を id として Lang.Get で引きます。行がなければ、Key・セクション名・選択肢は単語に分けて表示し(ProtectionWeight は Protection Weight)、説明文はそのまま表示します。翻訳するには、mod の LangMod フォルダの General シートに、それらの文字列を id にした行を足します(Elin シートMOD制作の基本とあなた を参照):
| id | filter | text_JP | text |
|---|---|---|---|
| ProtectionWeight | 防御の重み | Protection weight | |
| Score per point of PV. | PV 1 点あたりのスコア | Score per point of PV. |
値はプレイヤーが変えるとすぐ項目に書き込まれます。Awake でしか項目を読まないプラグインでは再起動後に反映されるので、説明文にそう書いてください。すぐ反映させるなら項目の SettingChanged を購読します。ページは開くたびに作り直されるので、ウィジェットの参照は保持しないでください。ConfigEntry でない状態は自分のフィールドに持ち、コールバックで読み書きします。
using System.Collections.Generic;
using BepInEx;
using BepInEx.Configuration;
using EModding;

[BepInPlugin("author.example", "Example", "1.0.0")]
public class ExamplePlugin : BaseUnityPlugin, IModConfig {
	public ConfigEntry<bool> enabled;
	public ConfigEntry<int> count;
	public ConfigEntry<string> preset;
	public string mode = "B", name = "hello";

	void Awake() {
		enabled = Config.Bind("General", "Enabled", true);
		count = Config.Bind("General", "Count", 5);
		preset = Config.Bind("General", "Preset", "b");
	}

	public void OnBuildConfig(UINote note) {
		note.AddHeader("General");
		note.Add(enabled);                                   // トグル
		note.AddSlider(count, 0, 100, "How many");           // スライダー。AcceptableValueRange は不要
		note.AddDropdown(preset, ["a", "b", "c"]); // 固定の選択肢

		note.AddHeader("Advanced");

		// ConfigEntry でない値は普通の UINote メソッドで
		var modes = ["A", "B", "C"];
		var dd = note.AddDropdown("Mode");
		dd.SetList(modes.IndexOf(mode), modes, (m, i) => m, (i, m) => mode = m, false);
		note.AddText("Which mode to use.", FontColor.Passive);

		UIButton b = null;
		b = note.AddButton("Name: " + name, () => Dialog.InputName("Name", name, (cancel, text) => {
			if (cancel) return;
			name = text;
			b.mainText.text = "Name: " + text;
		}, Dialog.InputType.Chat));

		note.AddTopic("Version", Info.Metadata.Version.ToString());
		note.AddButtonLink("Project page", "https://example.com/");
	}
}自動生成ページに少し足すだけなら、先に note.AddAll(Config); を呼んでから追加します。
自分の状態もリセットボタンでリセットするには、パッケージの onResetConfig にデリゲートを追加します。Config の項目はすでにリセットされるので、ここでは自分の状態だけを扱います:
void Start() {
	var pkg = ModUtil.FindFileProviderPackage(new FileInfo(Info.Location));
	if (pkg != null) {
        pkg.onResetConfig += () => mode = "B";
    }
}UINote 早見表
| メソッド | 得られるもの |
|---|---|
AddHeader(string) / AddHeaderTopic(string) | セクション見出し(自動生成ページもこれ)/ 小見出し |
AddToggle(string label, bool isOn, Action<bool>) | トグル。UIButton を返す |
AddSlider(float value, Func<float,string> action, float min = 0, float max = 1, bool isInt = false) | スライダー。action は値を受け取ってラベルの文字列を返す。Slider を返す |
AddDropdown(string label) | ラベルとドロップダウン。UIDropdown を返し、SetList(index, list, getName, onChange, notify: false) で中身を入れる |
AddButton(string text, Action) | 横幅いっぱいのボタン。UIButton を返す |
AddText(string) / AddText(string, FontColor.Passive) | 本文(折り返す) |
AddTopic(string label, string value) | 左にラベル、右に値 |
AddButtonLink(string text, string url) | リンク |
Space(int height) | 空行 |
AddImage(Sprite) / AddPrefab(string path) | 画像 / 自前の prefab |